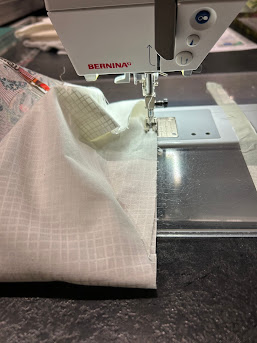
I recently bought a couple half yards of beautiful German fabric at a local quilt show. I was inspired by some dolly bags on the stand so came home and drew up a pattern. It's quite simple, the bags can be made up all in one fabric but look even better with two contrasting fabrics. My bags are lined with the contrasting fabric. On my second attempt I realised that the lining bottom, which is a circle can be lined with a wadding sandwich to give a bit more structure and protection to the bag, but that is an optional extra.
Pattern Pieces
Patterned fabric
2 @ 10" x 6"
1@ 6.5" circle
Contrast/lining fabric
2 @ 10" x 4"
1 @ 6.5" circle
1 @ 19.5" x 9.5"
Ribbon, cord or turned fabric tubing for the draw strings
Optional extras
1 @ 6.5" circle lining fabric
1@ 6.5" wadding
All seam allowances are 1/4 inch
- Start by cutting out your fabric pieces, my patterned fabric has dogs heads, (hence the doggy bag reference), and my contrast fabric is white with a tone on tone crosshatch pattern. I used a 6" circle template and cut with a 1/4" seam allowance added.
2. All seam allowances are 1/4 inch. Start by sewing the patterned and contrast fabrics together along the long edges. Press the seam allowance to the dark side.
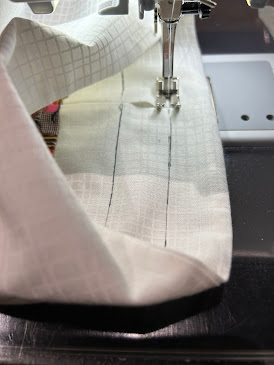
3. Mark a sewing line, I used a frixion pen that can be erased with the heat of an iron. I marked a line 1.25" down from the top edge, leave a gap of 1" then continue the line down the edge to the bottom edge of the pattern fabric. See the photo for a visual description. Sew this seam leaving the 1" gap.
4. Again on the lining fabric we will leave a 3" gap, this gap will be used to turn the bag inside out later. Sew this seam leaving the 3" gap.
6. If you are using wadding in the base make a sandwich
11. We now have two buckets, here you see the outer bag is inside out and the lining is right side out, this is how you need your pieces for the next stage. Put the lining inside the outer bag, so they are rights sides together, match the ling seam with one of the side seams, smooth the pieces into place so the top edges are even.
Turn the bag right side out through the 3" hole that we left earlier.
13. I machine sewed the hole closed or you can slip stitch the seam closed by hand. Push the lining inside the bag and press the top edge so the seam is on the edge or just very slightly on the inside for neatness.
14. Mark a casing line for your draw strings. I used a frixion pen which can be iron off later or you could use a purple disappearing marker...
I marked a sewing line 1" down from the bag top, then another sewing line 3/4" lower.
These lines should match up with the holes we left for the draw strings.
15. Turn your bag inside out for one last time. Machine sew the outer bag and lining on these two marked lines.
16. I've used ribbon, corded cotton rope, turned fabric tubes and my own twisted cotton cords.
Each bag requires 2 lengths of cord threaded in on each side. Each cord comes out from the same hole it was first threaded into, making a circle inside the casing. Tie the cord ends together on each side and trim the ends neatly
With a safety pin or threader, thread your draw strings through the casing and cut to size 3-4 inches longer before the strings are pulled together.
Congratulations, you've made a cute little dolly bag that has a variety of uses including Christmas Gift bags if you have some sparkly Christmas fabrics...
And now you know the process you can upsize or downsize, just remember to calculate the maths to fit the base.... C = (D x 3.14), however, fabric does move so a little wiggle room might be needed.....
Merry Christmas Everyone


This comment has been removed by a blog administrator.
ReplyDelete